This post is going to assume you have completed the following two posts. But they are not required.
Clonezilla can get to be annoying picking though the advanced settings before you deploy and image. But scripting this process can make it a breeze. The goal is to create a boot menu with a few image choices and add it to your multi-boot toolkit for easy deployment of images.
First we must get the required tools to complete this task.
1. Download the latest clonezilla ISO from clonezilla website.
2. Install NotePad++ for easy config editing later in this how-to.
3. Purchase Ultra-ISO from EZB Systems. $29.95 if you can find an alternative program for editing ISO files then use that bu any means, this was the easiest tool that i found to work.
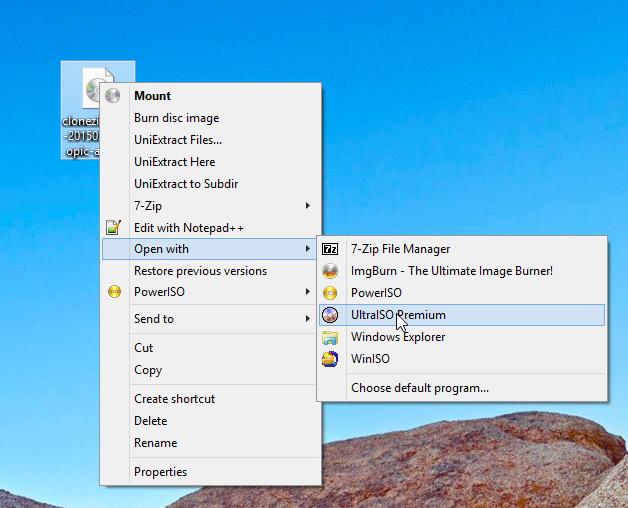
4. Open the clonezilla ISO file with Ultra-ISO program.
Clonezilla can get to be annoying picking though the advanced settings before you deploy and image. But scripting this process can make it a breeze. The goal is to create a boot menu with a few image choices and add it to your multi-boot toolkit for easy deployment of images.
First we must get the required tools to complete this task.
1. Download the latest clonezilla ISO from clonezilla website.
2. Install NotePad++ for easy config editing later in this how-to.
3. Purchase Ultra-ISO from EZB Systems. $29.95 if you can find an alternative program for editing ISO files then use that bu any means, this was the easiest tool that i found to work.
4. Open the clonezilla ISO file with Ultra-ISO program.
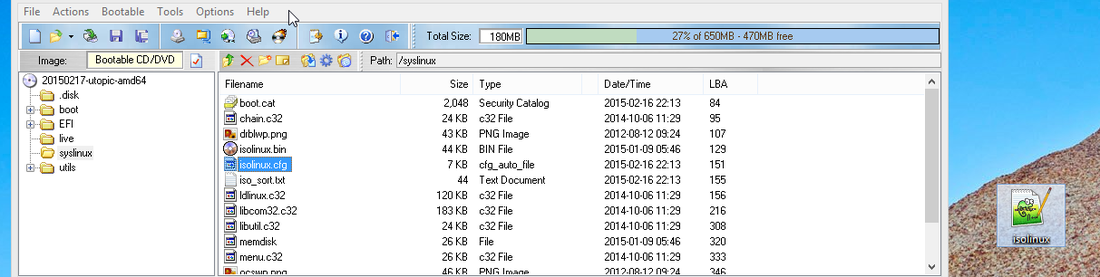
5. Navigate to the following location after you have opened the iso, /syslinux/
6. Copy isolinux.cfg to your desktop by draging it out of the folder.
6. Copy isolinux.cfg to your desktop by draging it out of the folder.
7. Edit the isolinux.cfg with Notepad++ and replace the contents with the following.
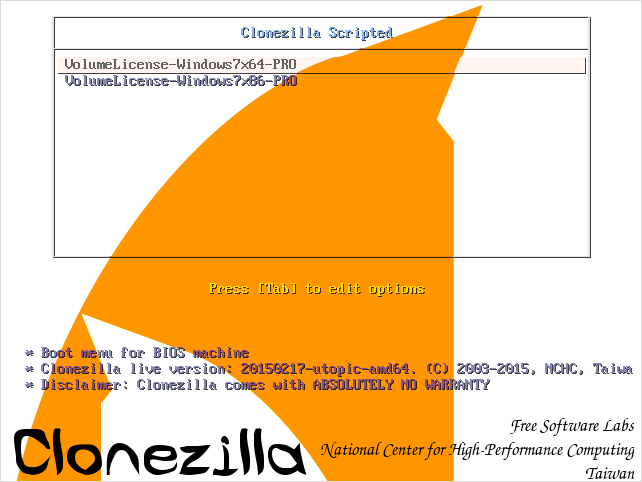
The Green Highlighted text is the name of the image that will be displayed in the clonezilla boot screen. And the Blue Highlighted text is the name of the image which should be placed on the root of the USB key we created before.
The Green Highlighted text is the name of the image that will be displayed in the clonezilla boot screen. And the Blue Highlighted text is the name of the image which should be placed on the root of the USB key we created before.
(SCRIPT STARTS BELOW THIS TEXT)
# Created by generate-pxe-menu! Do NOT edit unless you know what you are doing!
# Keep those comment "MENU DEFAULT" and "MENU HIDE"! Do NOT remove them.
# Note!!! If "serial" directive exists, it must be the first directive
default vesamenu.c32
timeout 300
prompt 0
noescape 1
MENU MARGIN 5
MENU BACKGROUND ocswp.png
# Set the color for unselected menu item and timout message
MENU COLOR UNSEL 7;32;41 #c0000090 #00000000
MENU COLOR TIMEOUT_MSG 7;32;41 #c0000090 #00000000
MENU COLOR TIMEOUT 7;32;41 #c0000090 #00000000
MENU COLOR HELP 7;32;41 #c0000090 #00000000
# MENU MASTER PASSWD
say **********************************************************************
say Clonezilla, the OpenSource Clone System.
say NCHC Free Software Labs, Taiwan.
say clonezilla.org, clonezilla.nchc.org.tw
say THIS SOFTWARE COMES WITH ABSOLUTELY NO WARRANTY! USE AT YOUR OWN RISK!
say **********************************************************************
# Allow client to edit the parameters
ALLOWOPTIONS 1
# simple menu title
MENU TITLE Clonezilla Scripted
# Since no network setting in the squashfs image, therefore if ip=, the network is disabled. That's what we want.
label Clonezilla live
MENU DEFAULT
# MENU HIDE
MENU LABEL VolumeLicense-Windows7x64-PRO
# MENU PASSWD
kernel /live/vmlinuz
append initrd=/live/initrd.img boot=live username=user config quiet noswap edd=on nomodeset noeject nolocales keyboard-layouts=NONE noprompt toram=filesystem.squashfs vga=791 ip= nosplash i915.blacklist=yes radeonhd.blacklist=yes nouveau.blacklist=yes vmwgfx.enable_fbdev=no ocs_prerun1="mount /dev/sdb1 /home/partimag/" ocsprerun2="sleep 10" ocs_live_run="/usr/sbin/ocs-sr -g auto -e1 auto -e2 -c -r -j2 -k1 -p true restoredisk VolumeLicense-Windows7x64-Pro sda"
TEXT HELP
* Boot menu for BIOS machine
* Clonezilla live version: 20150217-utopic-amd64. (C) 2003-2015, NCHC, Taiwan
* Disclaimer: Clonezilla comes with ABSOLUTELY NO WARRANTY
ENDTEXT
# Since no network setting in the squashfs image, therefore if ip=, the network is disabled. That's what we want.
label Clonezilla live
# MENU DEFAULT
# MENU HIDE
MENU LABEL VolumeLicense-Windows7x86-PRO
# MENU PASSWD
kernel /live/vmlinuz
append initrd=/live/initrd.img boot=live username=user config quiet noswap edd=on nomodeset noeject nolocales keyboard-layouts=NONE noprompt toram=filesystem.squashfs vga=791 ip= nosplash i915.blacklist=yes radeonhd.blacklist=yes nouveau.blacklist=yes vmwgfx.enable_fbdev=no ocs_prerun1="mount /dev/sdb1 /home/partimag/" ocsprerun2="sleep 10" ocs_live_run="/usr/sbin/ocs-sr -g auto -e1 auto -e2 -c -r -j2 -k1 -p true restoredisk VolumeLicense-Windows7-X32 sda"
TEXT HELP
* Boot menu for BIOS machine
* Clonezilla live version: 20150217-utopic-amd64. (C) 2003-2015, NCHC, Taiwan
* Disclaimer: Clonezilla comes with ABSOLUTELY NO WARRANTY
ENDTEXT
label iPXE
# MENU DEFAULT
MENU HIDE
MENU LABEL Network boot via iPXE
# MENU PASSWD
kernel /live/ipxe.lkn
TEXT HELP
Run iPXE to enable network (PXE) boot
ENDTEXT
MENU END
(SCRIPT END ABOVE THIS TEXT)
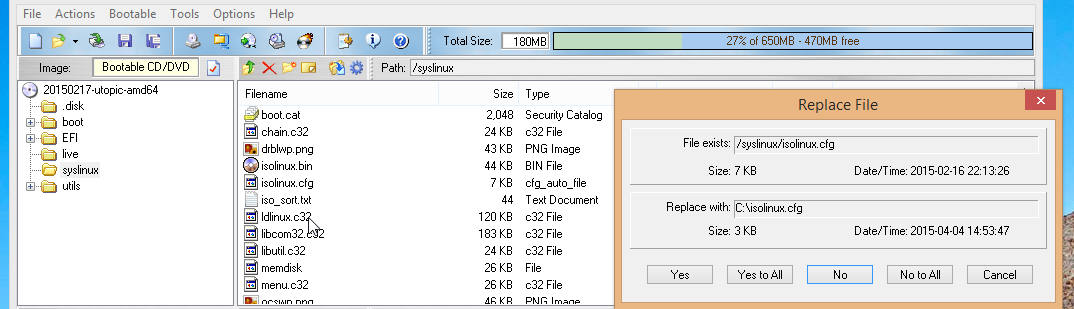
8. After you have adjusted the following script save the cfg file and replace the isolinux.cfg file in the clonezilla ISO by dragging it back into Ultra-ISO.
9. Its time to save changes to the ISO, choose File Save As and save it to your usb key \_ISO\MAINMENU\ Clonezilla and remember to change the extension to .isodefault
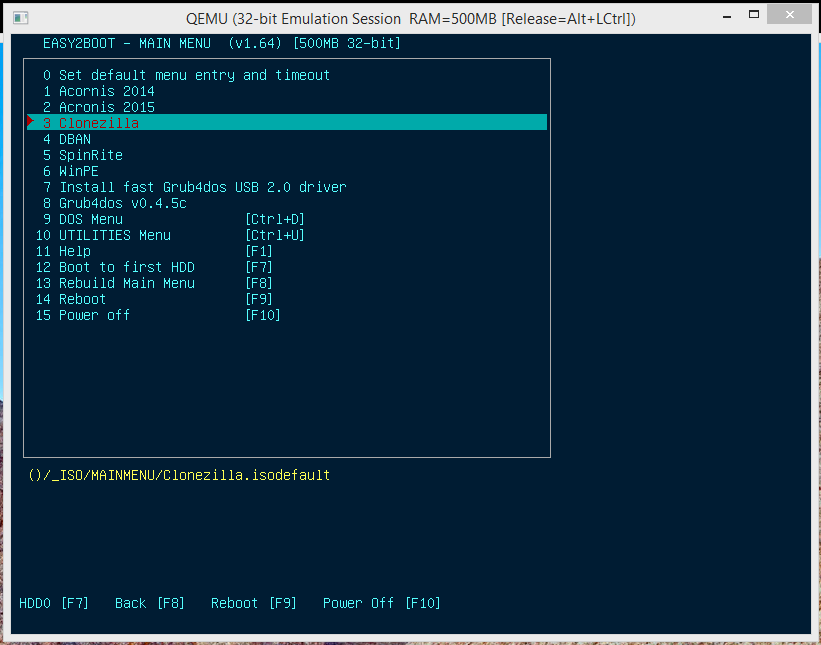
Now when we boot it will display your image list and you can select enter to select the image to deploy and press Y, and Y again to erase and deploy image on a new computer. As shown below.
Now when we boot it will display your image list and you can select enter to select the image to deploy and press Y, and Y again to erase and deploy image on a new computer. As shown below.
That's it now get to work on deploying your images!


 RSS Feed
